

Have you ever considered, that kids don’t have anything of theirs they can give? They can’t go to shops and buy you flowers or a gift. They can’t take you out for a treat. Often, the only thing that is truly theirs to give away is a picture drawn by them! Kids’ artwork is truly precious in that way!
This post contains affiliate links. Purchasing through these links will not cost you anything extra and will support me in the running of this site :)
They pour their heart into this piece of art, thinking of you as they’re creating it, just to have something to gift you!
So take time to have a good look at it when it’s handed to you and appreciate them for it! Make it as big a deal as it is and display proudly!
My kids’ artwork is one of my favourite ways to bring colour to my walls and my day – it brings me joy every time I look at it!
I hear many people striving towards minimalism, complain about storing their kids artwork. Being a minimalist means being surrounded by things that have a purpose, or bring you joy! It’s what YOU make of it! The years of the kids being little and drawing for you are very limited, so enjoy them while they last! Let their scribbles bring you joy! I understand that a lot of minimalists feel anything messy-looking should be out of their house, and I admit, a fridge overfilled with pictures and magnets can be overwhelming and not very practical, but you can still have a nice looking house and not break your kids little hearts by throwing their hard work of love into the recycling bin!
Here are a few ideas for you:
1) Designate a special spot in the house where you can display the kids’ artwork
It won’t look messy if it’s all together in a special spot, such as a pin board on the wall!

Image Credit: Young House Love
2) Frame the art and make a gallery wall
This is a step up from a pin board and will look fantastic! It does have its limitations in the sizes and number of art that can be displayed compared to a pin board, but it makes for a great display option for the living room! Here are some great looking options from Amazon for frames, the magnetic poster hanger would make the changing of the kids’ artwork nice and easy!


3) Use as wrapping paper for gifts for grandparents, aunties and uncles
Once the piece has been loved, appreciated and displayed, it can be used as wrapping paper rather than thrown out! It also saves you spending money on wrapping paper, which is something that gets disposed pretty much immediately!
4) Take photos!
No matter what you choose to do with the kids’ artwork, you can’t keep all of it! As you’re rotating through it, make sure you take photos of your favourite pieces to keep a digital copy before putting it in the recycling bin! This works especially well when they present you with a 3D creation! I love taking photos of my kids holding the pieces they just created, because then I not only have the art, but also the joyful, proud expressions on their faces!

5) Use as rotating wallpaper on your computer’s desktop/screensaver
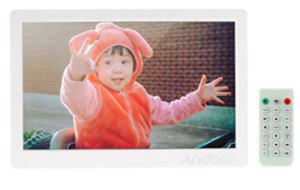
If you prefer to keep digital copies of your kids’ drawings and other artwork, you can still display it on your computer, or phone/tablet! Or consider a digital photo frame to put on display – they have become much more affordable than they used to be when they first came out!
Do you have any other tips or ideas? Have you created an amazing display wall you’d like featured?
Contact me through the contact form on my Home Page!
❤
-A-


Thank you for this great post. I’m new to motherhood and I keep everything my son draws and colours. I didn’t know how to keep them or manage them. Now I have a few ideas up my sleeve.
Love the photo of your child drawing! Thanks for the inspiration, I’m going to get up close and take a pic like this of my daughter, she loves to draw!
Another idea I have heard is to make a photobook of artwork that each child has made. Love the ideas you have included in this post.